
My account

Boston Scientific accounts are for healthcare professionals only.

Create an account to access online training and education on EDUCARE, manage your customer profile, and connect with customer support and service teams.

My Boston Scientific account

Access your online applications and manage your customer profile.

Quick Links

Call customer care

Boston Scientific LUX-Dx II+ Insertable Cardiac Monitor and report strip.

Intuitive insertion procedure

Focused on simple familiarity

With the LUX-Dx II+™ Insertable Cardiac Monitor (ICM), insertion efficiency is a familiar feeling — the intuitive process is designed for reliable placement, rapid validation and confident completion.


ICM device insertion process

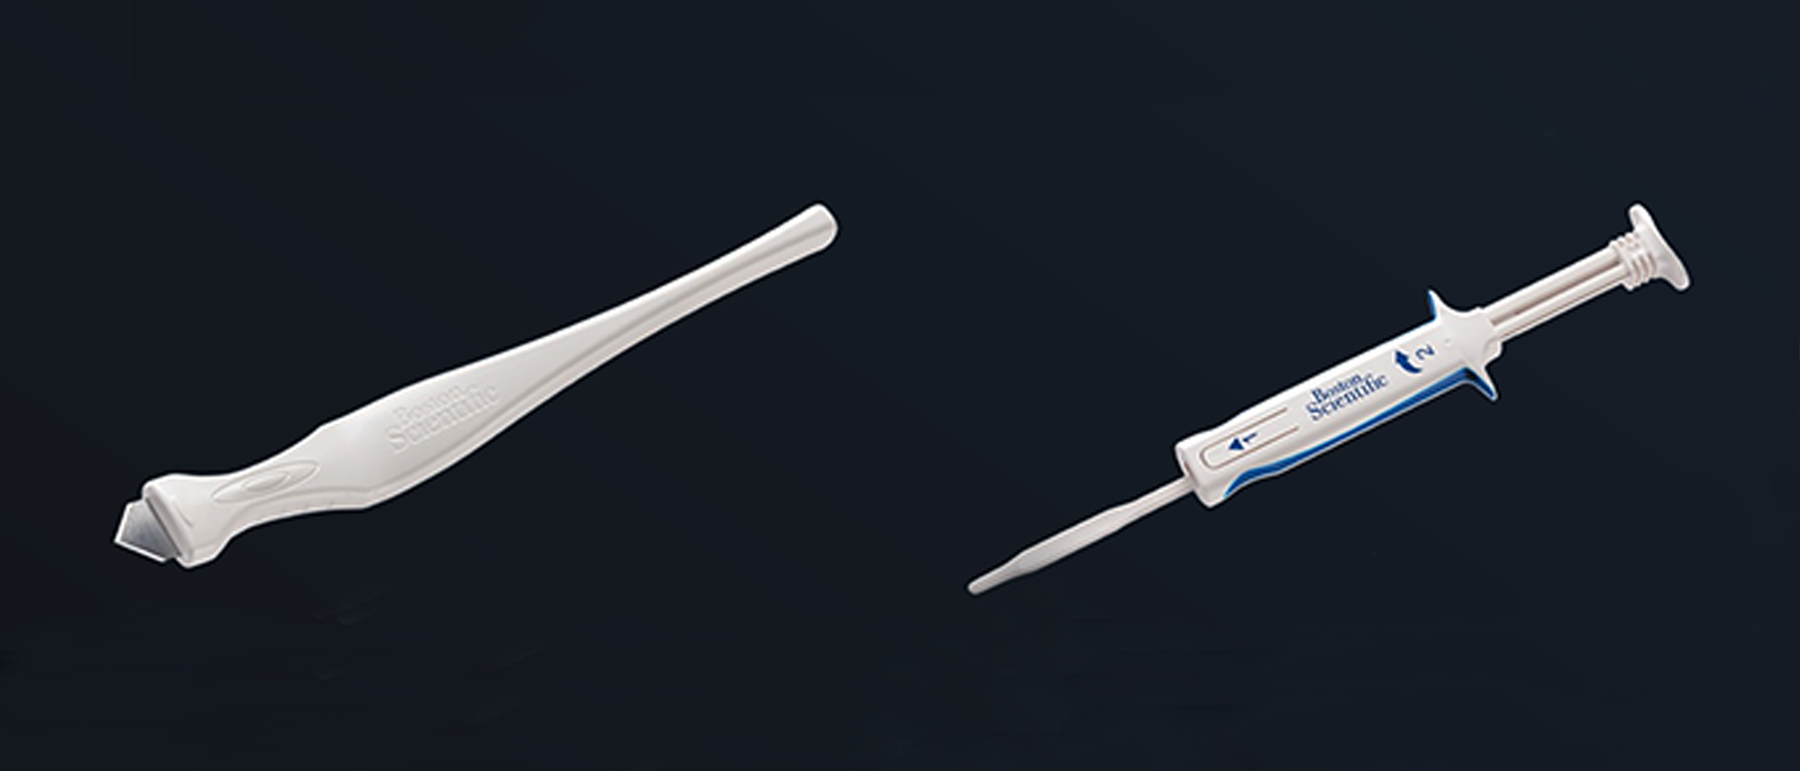
The LUX-Dx ICMs come pre-loaded in a single-piece insertion tool and uses a familiar procedure for more efficient and confident insertion.
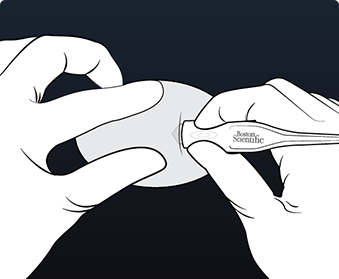
Hands wearing surgical gloves creating incision with LUX-Dx Incision Tool.

STEP 1: Cut

While applying tension on the skin away from the incision location, cut at the intended angle until the blade is fully inserted. Technique may vary based on clinician preference and patient assessment.
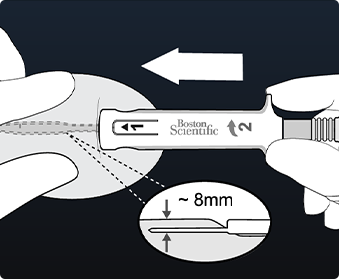

Hands inserting LUX-Dx Insertion Tool into opening 8mm under the skin.

STEP 2: Tunnel

At the incision location, fully insert the tunneling portion of the insertion tool parallel to the skin approximately 8 mm under the surface.
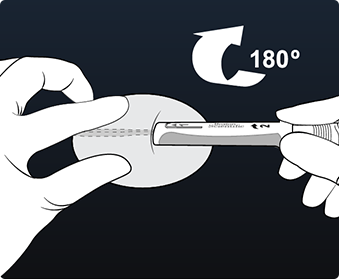

Hands twisting LUX-Dx Insertion Tool 180 degrees to create a pocket.

STEP 3: Rotate

Rotate the insertion tool 180° in either direction, creating a pocket for the device to be inserted.
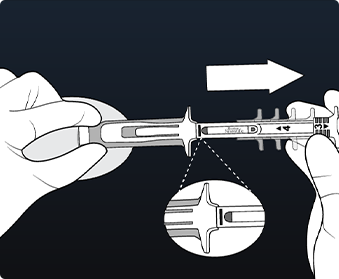

Hands pulling back plunger of LUX-Dx Insertion Tool to premarked blue line.

STEP 4: Pull Back

Hold the base of the insertion tool to the incision site and pull back the plunger until you feel a hard stop or until the blue line is visible. This ensures the device has dropped down into the channel.
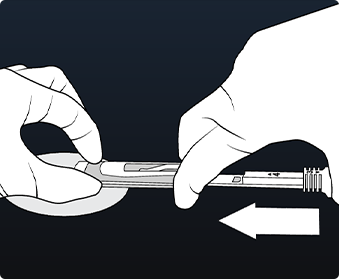
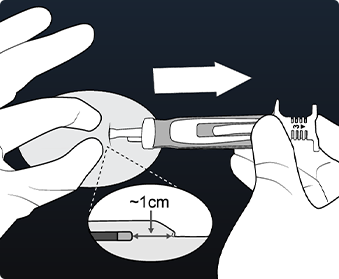

Hands pushing plunger of LUX-Dx Insertion Tool fully to place device in pocket.

STEP 5: Insert

Lower the body of the tool close to the skin. Firmly hold the base of the insertion tool at the incision site while pushing the plunger in completely.


Hands removing LUX-Dx tool and closing using standard surgical techniques.

STEP 6: Remove

Pinch the incision site to hold the device in place while removing the insertion tool.

LUX-Dx ICM cutting tool for implant procedure

The LUX-Dx II+ ICM includes an incision tool (left), and a reloadable, all-in-one insertion tool (right) to simplify the device insertion procedure.

LUX-Dx™ Learning Center

Explore interactive app demos and videos, algorithm animations and an interactive PDF resource guide.

gfg f  fd
A sales rep and a healthcare professional conversing.

Stay informed

Sign up for our email list to stay up to date on the latest LUX-Dx ICM Systems product releases, clinical updates, trainings and more.

Request a representative

Reach out to our team to get more information about the LUX-Dx II+ ICM System.